> ## Documentation Index
> Fetch the complete documentation index at: https://docs.retellai.com/llms.txt
> Use this file to discover all available pages before exploring further.
# Outbound Calls (Make Calls)
> Make outbound phone calls with Retell agents — bind agents to your numbers, prepare API credentials, and trigger calls programmatically or from the dashboard.
## Overview
This guide covers how to make outbound calls with your Retell agents. Before proceeding, ensure you have:
* Created and configured an agent
* Purchased or imported phone numbers
* Set up your API credentials
## Prerequisites
* **Phone Number**: A Retell-managed or imported number
* **Agent**: A configured agent ready for outbound calls
* **API Key**: Your Retell API key for authentication
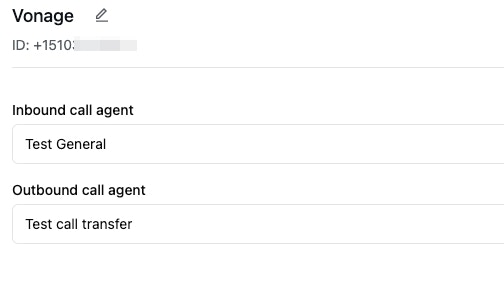
## Step 1: Bind Agents to Phone Numbers
Before making calls, you must assign agents to your phone numbers. This configuration determines how your number handles both inbound and outbound calls.
### Configuration Options
| Setting | Purpose | Use Case |
| ------------------ | --------------------------------------- | ----------------------------- |
| **Inbound Agent** | Handles incoming calls to this number | Customer support, callbacks |
| **Outbound Agent** | Used when making calls from this number | Sales outreach, notifications |
### Flexible Agent Assignment
* **Different agents**: Use specialized agents for inbound vs outbound
* **Outbound only**: Leave inbound agent unset to prevent callbacks
* **Inbound only**: Configure only inbound agent for receive-only numbers
After binding an inbound agent, your number is immediately ready to receive calls. Test it by calling the number!
### A/B Testing
See [A/B Testing](/deploy/ab-testing).
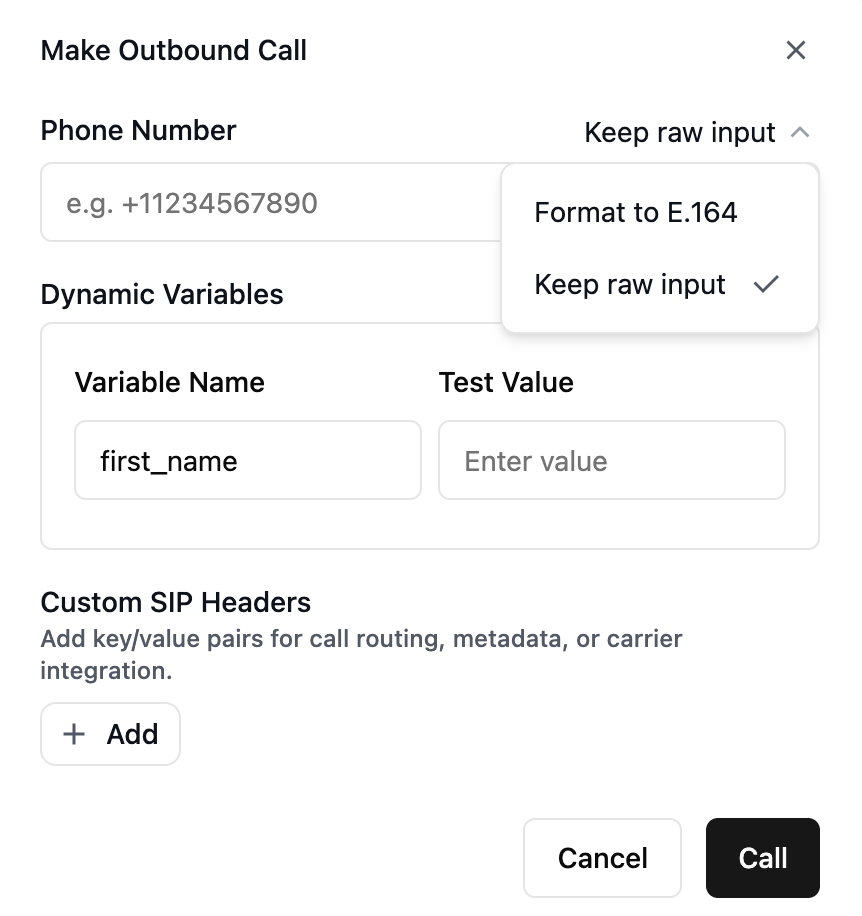
## Step 2: Make Outbound Calls
### International Calling Restrictions
**Retell-purchased numbers**: Retell supports calling to [15 countries](/deploy/international-call).
**Imported numbers**: International calling depends on your telephony provider's settings.
### Call Parameters
When making outbound calls (v2), these parameters are supported:
| Parameter | Type | Example | Description |
| ------------------------------ | -------------- | ------------------------------- | ----------------------------------------------------------------------- |
| `from_number` | string (E.164) | `+14157774444` | Your Retell-managed or imported number. |
| `to_number` | string (E.164) | `+12137774445` | Destination number. |
| `override_agent_id` | string | `agent_abc123` | Override the agent used for this call (optional). |
| `override_agent_version` | integer | `1` | Version of the override agent; defaults to latest if omitted. |
| `agent_override` | object | See below | Per-call partial overrides for agent/response engine (optional). |
| `metadata` | object | `{ "customer_id": "cust_123" }` | Free-form metadata stored with the call (size limit applies). |
| `retell_llm_dynamic_variables` | object | `{ "name": "John" }` | Key–value strings injected into prompts/tools (optional). |
| `custom_sip_headers` | object | `{ "X-Call-ID": "123" }` | Outbound SIP headers forwarded to your provider (optional). |
| `ignore_e164_validation` | boolean | `false` | Only for custom telephony. Bypass E.164 validation for special routing. |
Agent overrides let you adjust per-call behavior without changing the saved agent. See “Agent Overrides” in the [Create Phone Call API](/api-references/create-phone-call) for supported fields and examples.
### API Implementation
For complete parameter documentation, see [Create Phone Call API Reference](/api-references/create-phone-call).
```typescript Node theme={null}
const registerCallResponse = await retell.call.createPhoneCall({
from_number: '+14157774444', // replace with the number you purchased
to_number: '+12137774445', // replace with the number you want to call
// Optional: per-call agent selection and overrides
override_agent_id: 'agent_abc123',
override_agent_version: 0, // or omit to use latest
agent_override: {
agent: {
voice_speed: 1.1,
enable_backchannel: true,
},
// retell_llm or conversation_flow overrides are also supported
},
retell_llm_dynamic_variables: { // dynamic variables (optional, string values only)
name: 'John Doe',
blood_group: 'B+'
},
custom_sip_headers: { // replace with custom sip headers you want to send (optional)
X-Custom-Header: 'Custom Value'
}
});
console.log(registerCallResponse);
```
```python Python theme={null}
# Initiate an outbound call using the newly created agent
call = client.call.create_phone_call(
from_number="+14157774444", # replace with the number you purchased
to_number="+12137774445", # replace with the number you want to call
# Optional: per-call agent selection and overrides
override_agent_id="agent_abc123",
override_agent_version=0, # or omit to use latest
agent_override={
"agent": {
"voice_speed": 1.1,
"enable_backchannel": True,
}
},
retell_llm_dynamic_variables={ # dynamic variables (optional, string values only)
name: 'John Doe',
blood_group: 'B+'
},
custom_sip_headers={ # replace with custom sip headers you want to send (optional)
X-Custom-Header: 'Custom Value'
}
)
print(call)
```
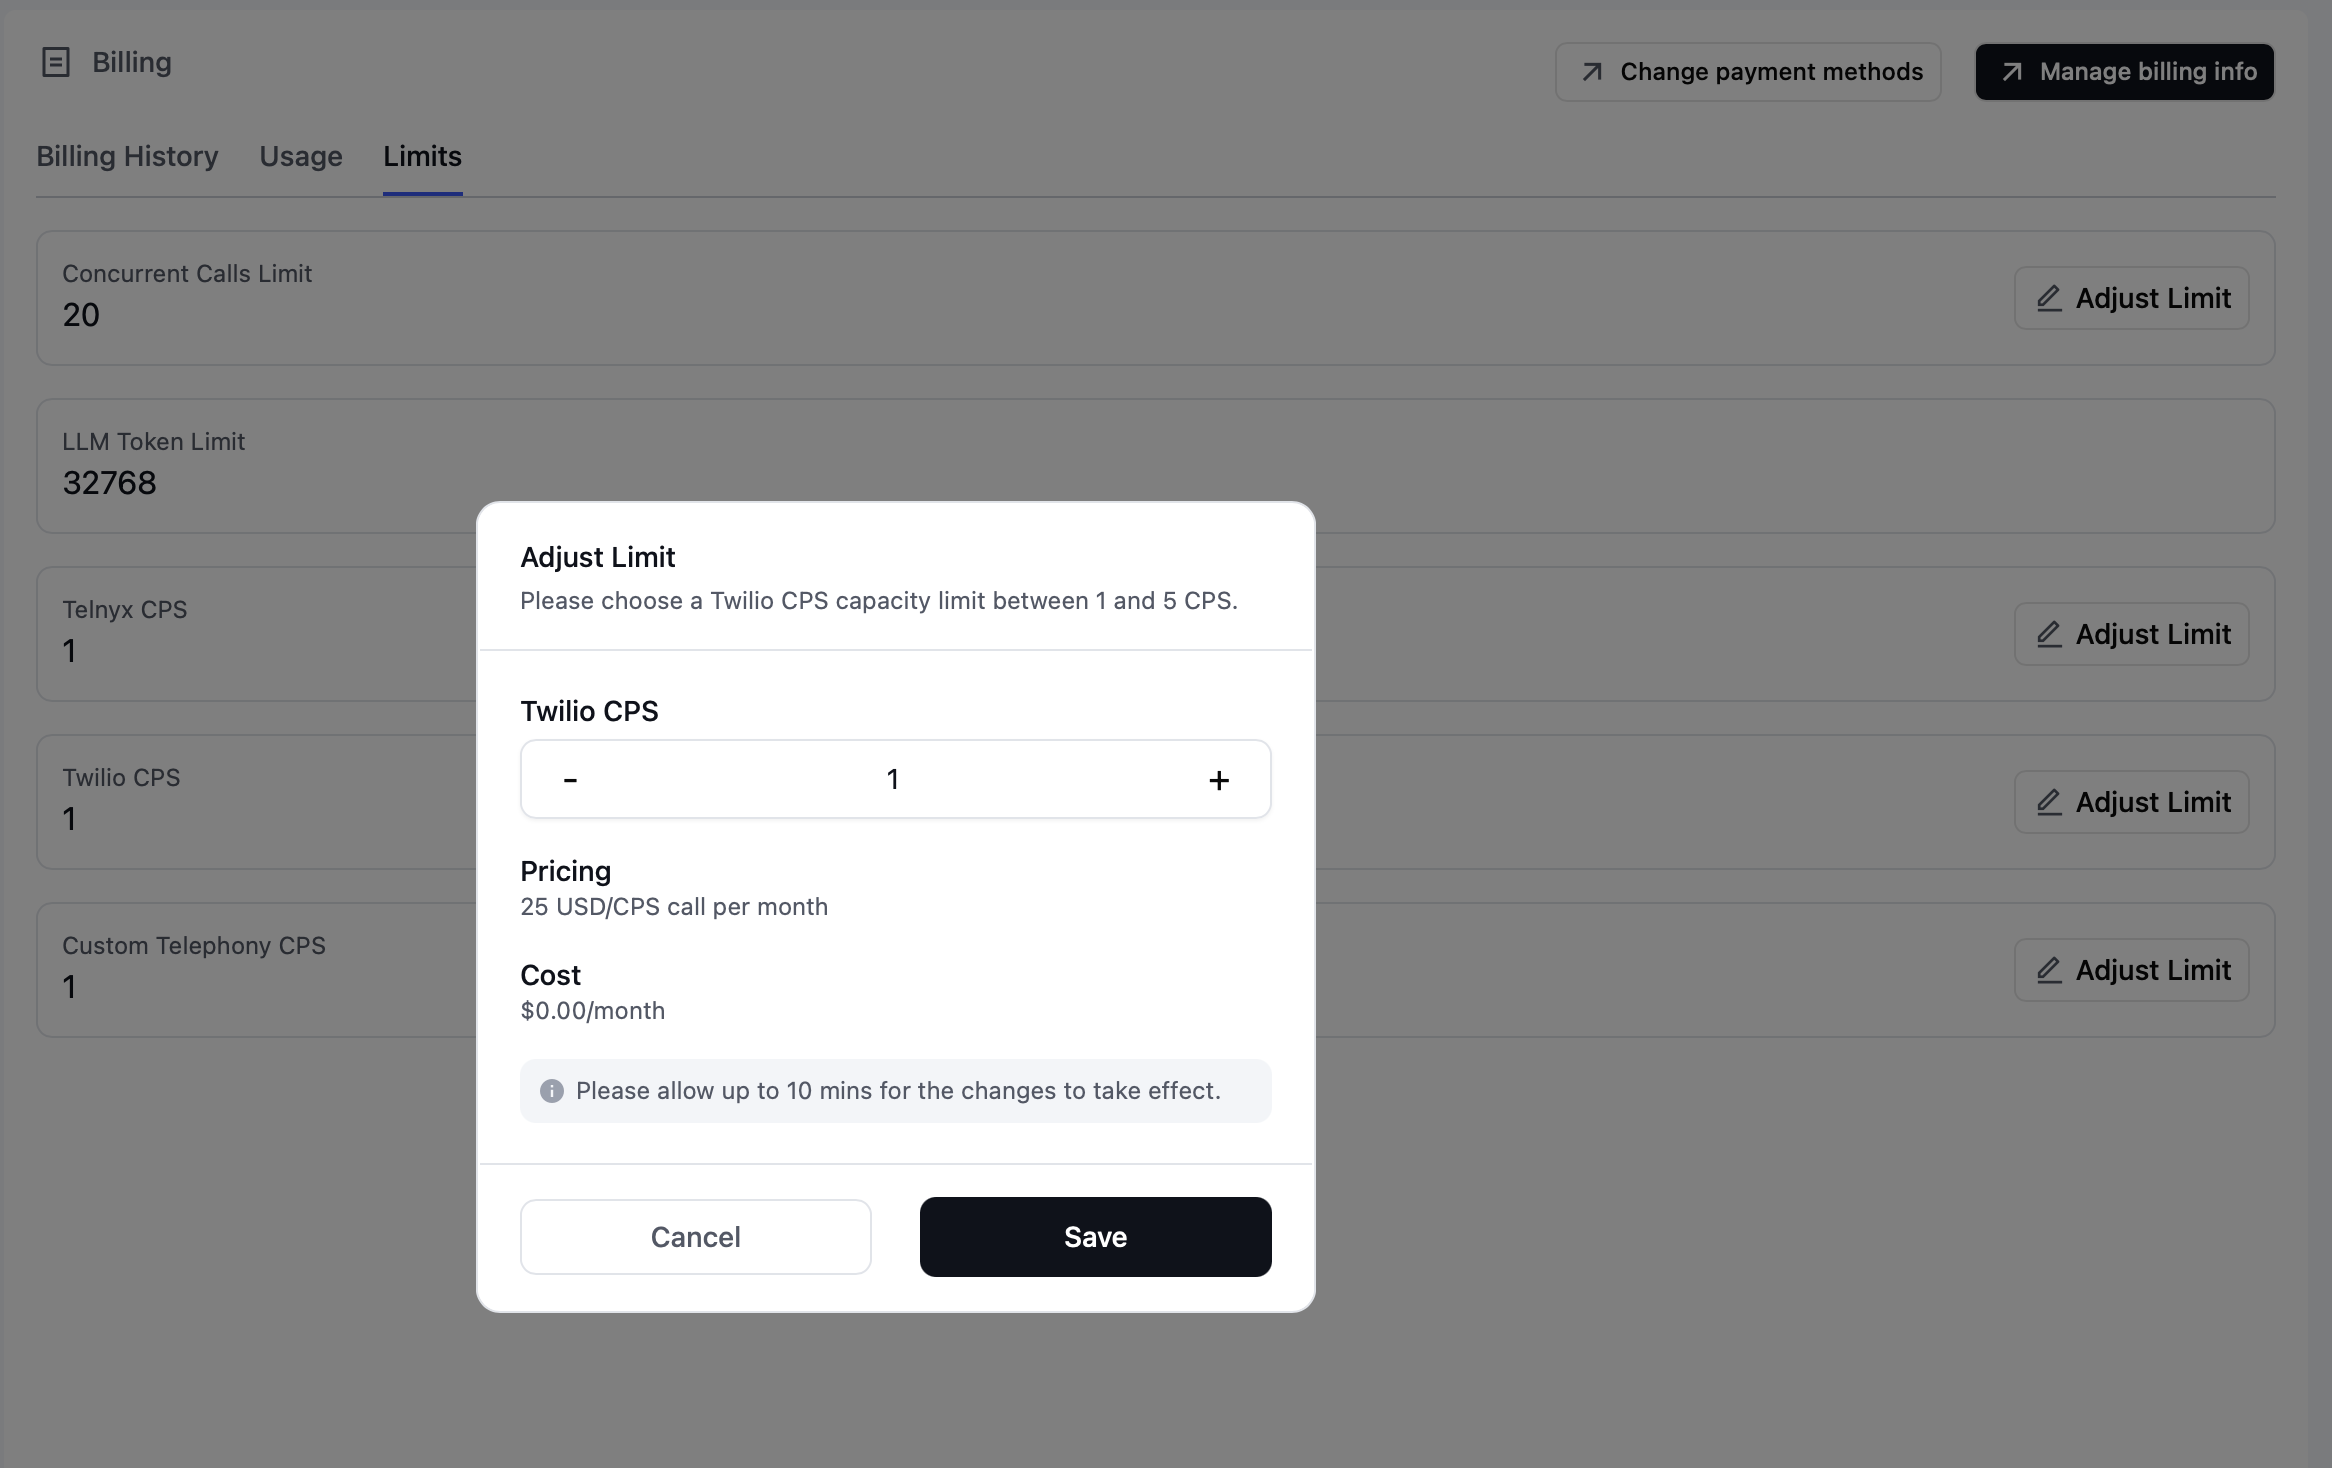
## Step 3: Configure CPS (Calls Per Second)
### Understanding CPS Limits
CPS (Calls Per Second) controls how many outbound calls you can initiate per second. This prevents system overload and ensures call quality.
### Default Limits & Scaling
| Provider | Default CPS | Maximum CPS | Notes |
| -------------------- | ----------- | ----------- | ---------------------------------------------------------------------------- |
| **Twilio** | 1 | 5 | Changes take up to 10 minutes |
| **Telnyx** | 1 | 16 | Instant updates |
| **Custom Telephony** | 1 | 150 | Check your custom provider's SIP trunk capacity before increasing this limit |
### Important Considerations
1. **Throttling Protection**: Exceeding limits results in rejected calls
2. **Gradual Scaling**: Start low and increase based on actual needs
3. **Provider Limits**: Your telephony provider may have additional restrictions
4. **Cost Impact**: Higher CPS may increase telephony costs
### Best Practices for High-Volume Calling
**Implement retry logic** with exponential backoff to handle throttling gracefully:
```javascript theme={null}
// Example retry logic
const maxRetries = 3;
let retryDelay = 1000; // Start with 1 second
for (let i = 0; i < maxRetries; i++) {
try {
await makeCall();
break;
} catch (error) {
if (error.code === 'rate_limited') {
await sleep(retryDelay);
retryDelay *= 2; // Exponential backoff
}
}
}
```
## Step 4: Monitor Call Details
### Available Monitoring Methods
#### 1. API Polling
Use [Get Call API](/api-references/get-call) to retrieve:
* Full transcript
* Call recording
* Latency metrics
* Function call logs
* Call duration and status
#### 2. Real-time Webhooks
Set up [webhooks](/features/webhook-overview#event-types) to receive instant notifications for:
* **Call Started**: When the call connects
* **Call Ended**: Final status and duration
* **Call Analyzed**: Transcript and analysis ready
* **Call Failed**: Error details and reasons
Webhooks provide real-time updates without polling, making them ideal for production systems.
Triggering Outbound Calls (Using Make.com)
### Additional Resources
* [Community Templates](https://docs.google.com/document/d/1hx6hdTEjAR4y4xXZ7RLMH2byQNVW1ABxC8S4FwvTx_Y/edit?tab=t.0#heading=h.wf5bktkelope): Real-world outbound calling examples
* [Batch Calling Guide](/deploy/make-batch-call): For high-volume campaigns
* [Webhook Setup](/features/webhook-overview): Configure real-time notifications
 ### API Implementation
For complete parameter documentation, see [Create Phone Call API Reference](/api-references/create-phone-call).
### API Implementation
For complete parameter documentation, see [Create Phone Call API Reference](/api-references/create-phone-call).