

Add the Call Transfer function
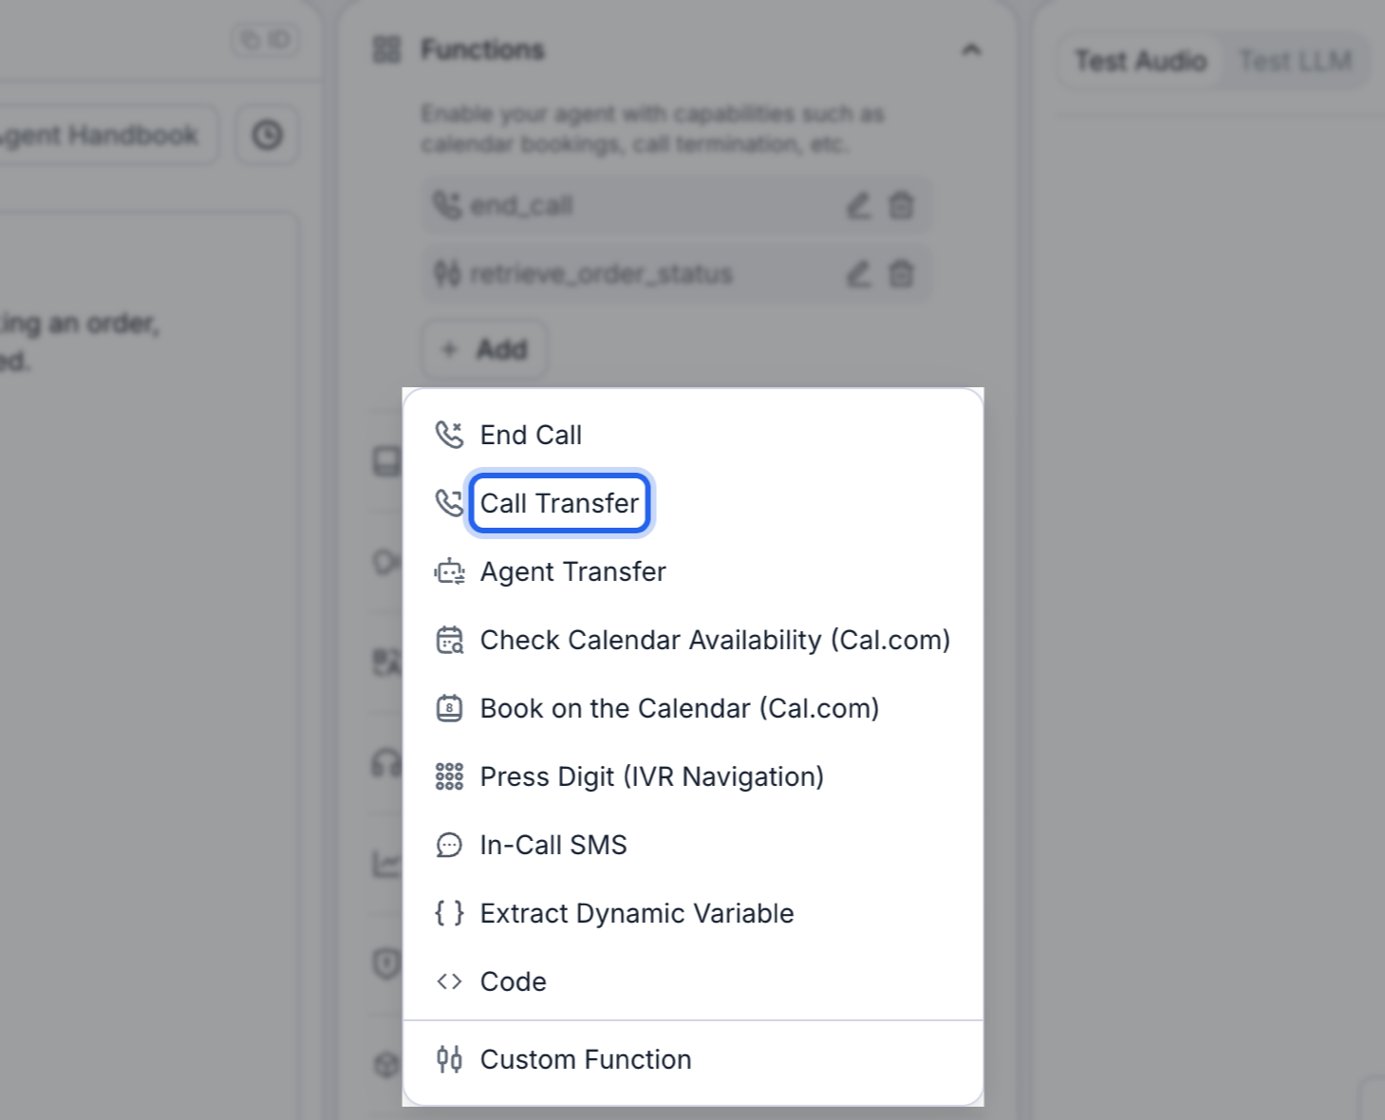
Add Call Transfer from the Functions dropdown.
Set the transfer target
- a number in E.164 format, or a SIP URI in the form
sip:username@domain(for examplesip:user@retellai.com), or - a dynamic variable that gets substituted at runtime.
sip:user:password@domain is not supported, and the tool has no separate username or password field for the transfer destination. If the destination requires authentication, use custom SIP headers below (for example, an X- header your SIP endpoint parses), or terminate the transfer at an endpoint you control that then authenticates onward.Set the transfer number extension if needed. The extension can contain 0-9, *, and # (for example 123#).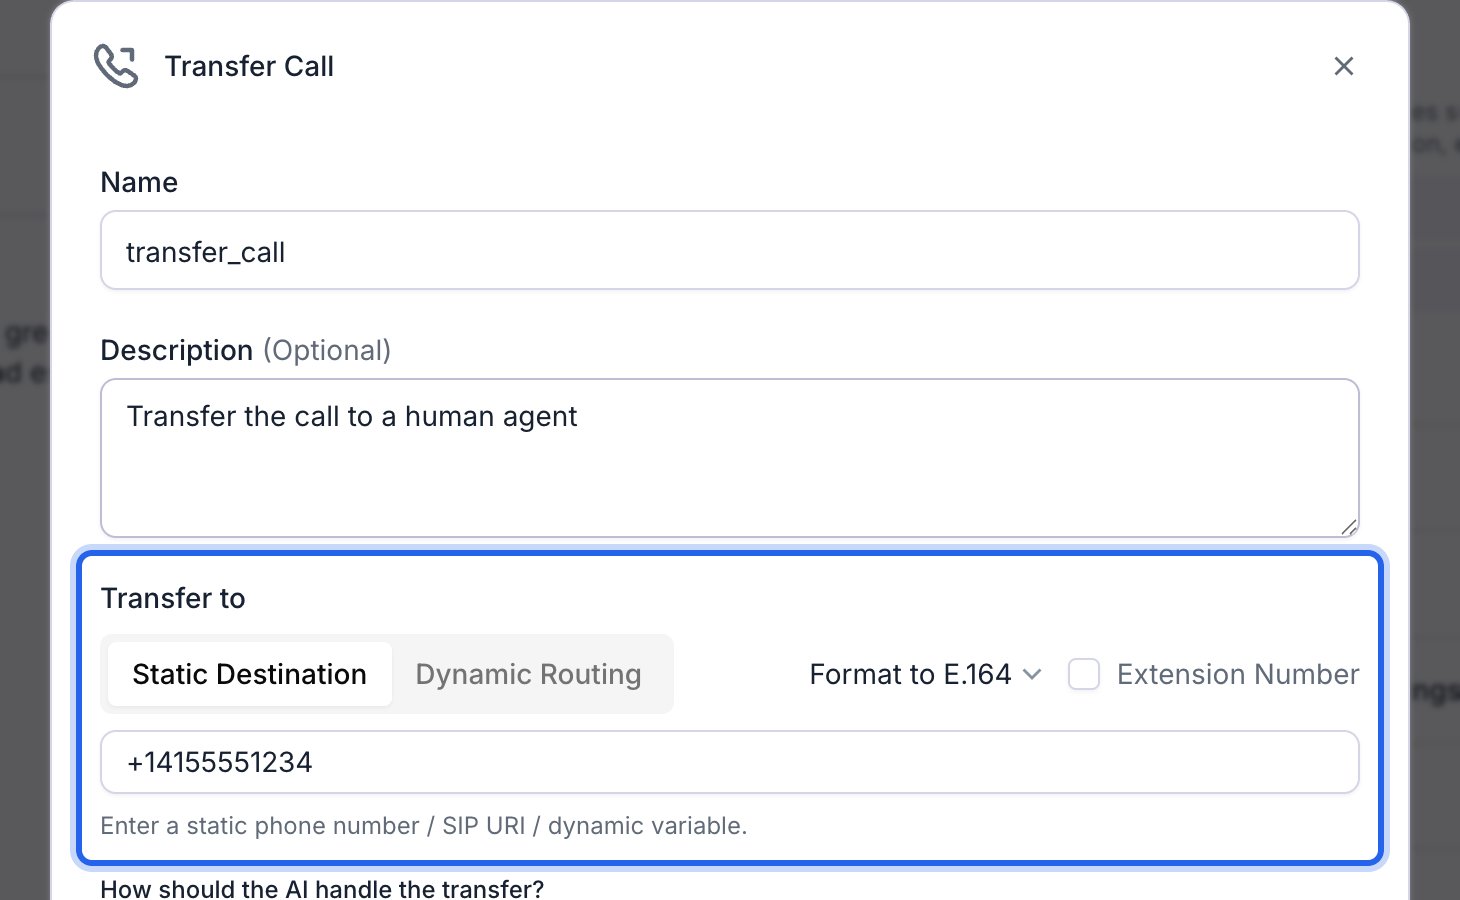
Enter the transfer number in E.164 format, or use a dynamic variable.
Update the prompt
If the user is angry or frustrated, use the transfer_call tool to transfer the conversation to a human agent.
Choose the transfer type
- Cold Transfer: The call goes straight to the destination and your agent drops off right away, like transferring a call and hanging up.
- Warm Transfer: Your agent stays on the line after dialing the destination. It can wait for a real person to speak, play a private message only the destination hears, or do a quick three-way introduction before connecting your caller.
- Agentic Warm Transfer: A second AI agent, the transfer agent, picks up the handoff, has a short back-and-forth with the destination, then decides whether to connect (bridge) your caller or cancel. Use this when you want an AI agent to screen or brief the destination first.
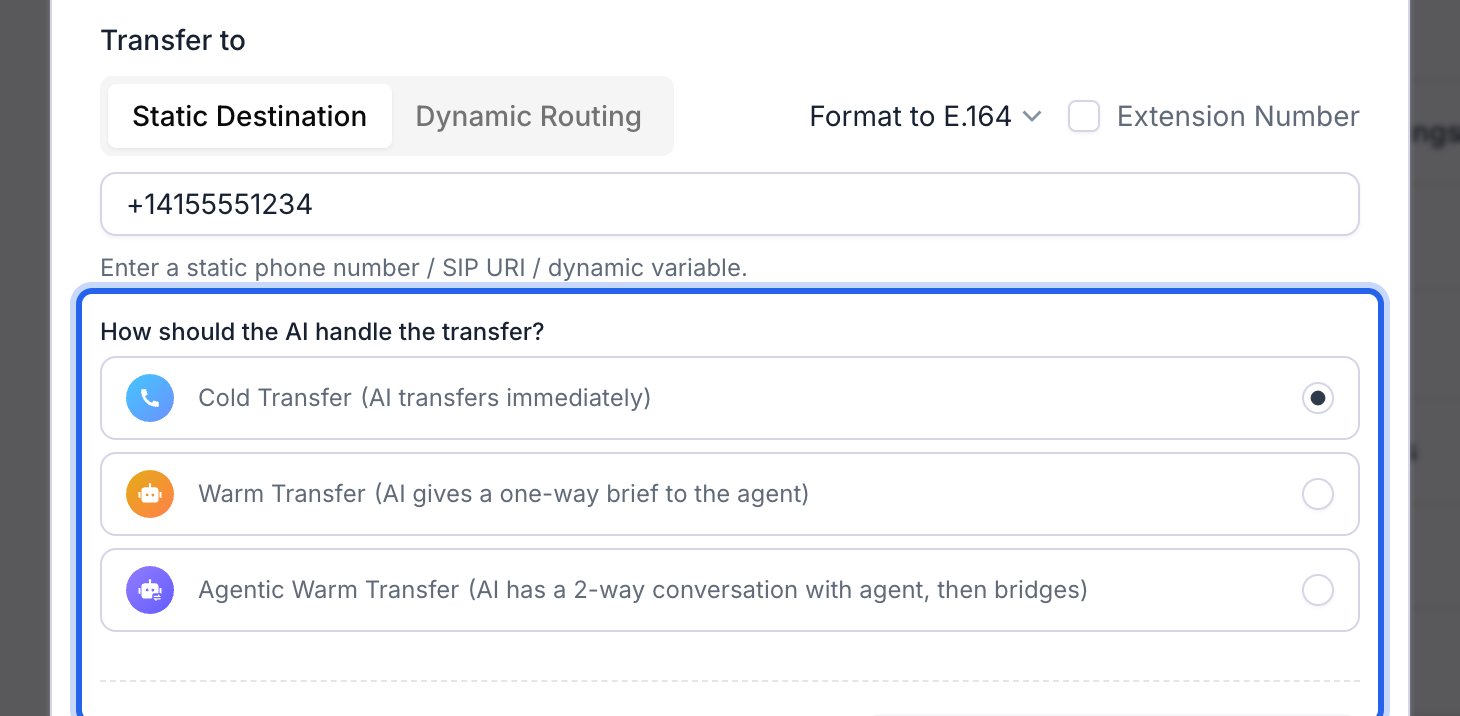
The three transfer types.
Configure caller ID (optional)
- Retell Agent’s Number: The destination sees the Retell agent’s number.
- User’s Number: The destination sees the caller’s number. Your telephony provider must support caller ID override for this to work.
- Warm transfer uses SIP DIAL, setting the
fromandP-Asserted-Identityheaders to the user’s number. - Cold transfer uses SIP REFER; supporting caller ID override is up to the telephony provider.
- Retell Twilio numbers support showing the user’s number on both warm and cold transfer. Retell Telnyx numbers support it only via cold transfer (SIP REFER).
- If caller ID override isn’t supported, the transfer fails.
- Warm transfer uses SIP DIAL, setting the
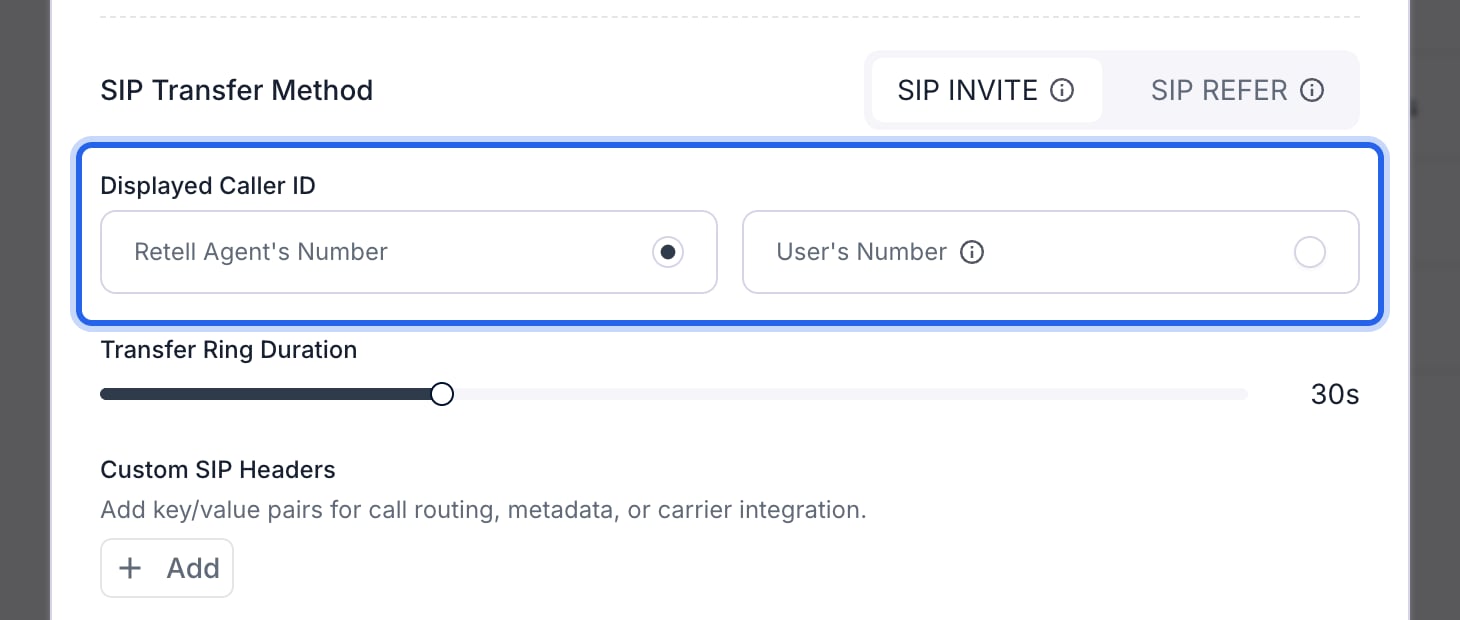
Choose whether the destination sees the Retell agent's number or the caller's number.
Set the transfer ring duration (optional)
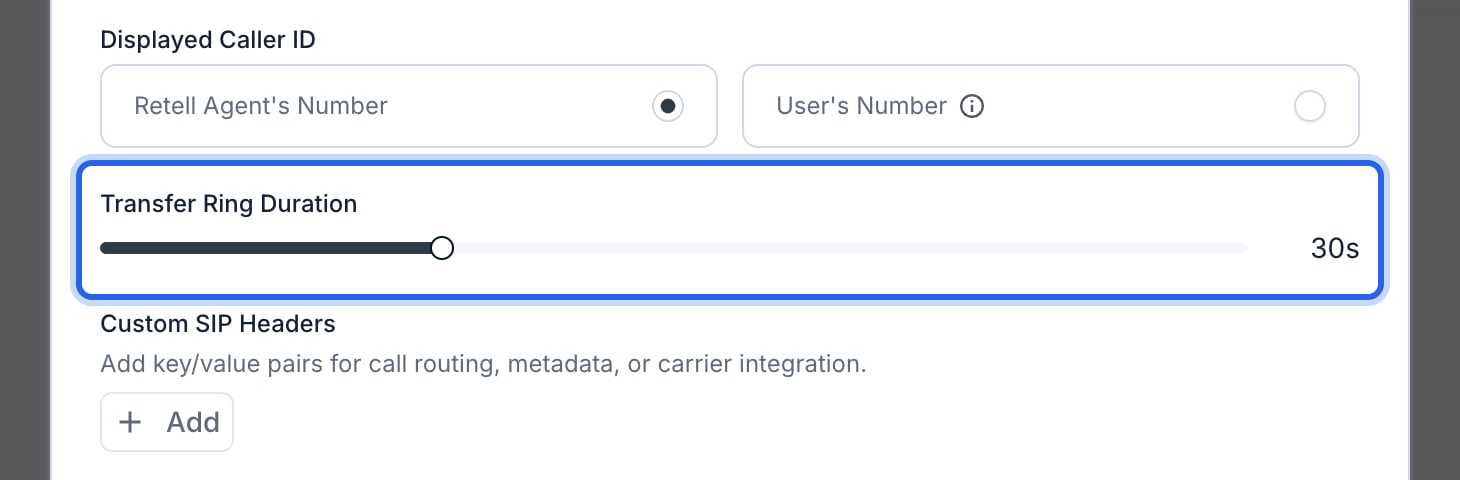
Set how long the destination rings before the transfer counts as unanswered.
Add custom SIP headers (optional)
X-, or be User-To-User (case insensitive).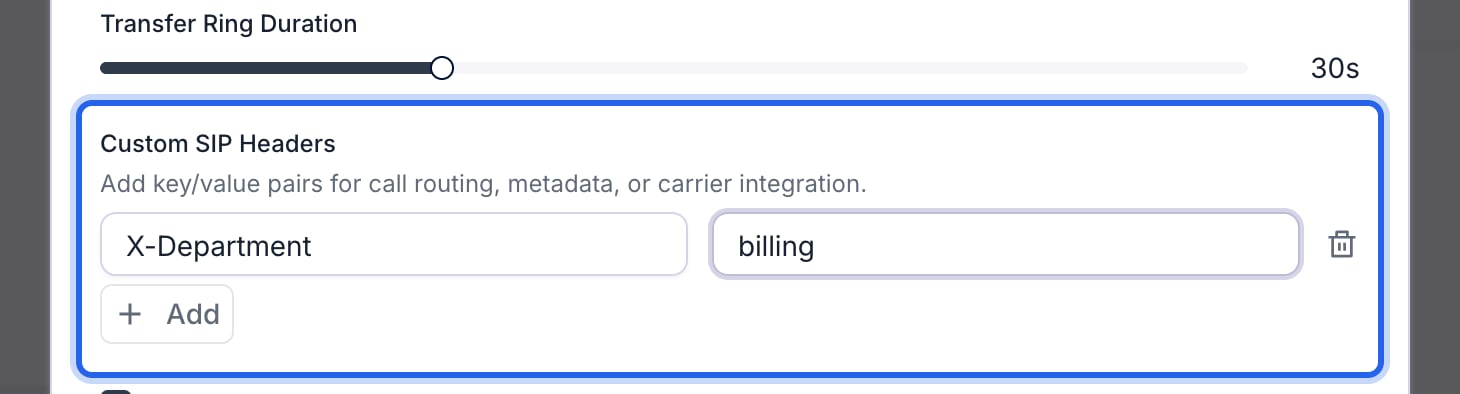
Add custom SIP headers forwarded on the SIP INVITE.
Cold transfer settings
Cold transfers have one setting of their own: the SIP method used to hand off the call. SIP (Session Initiation Protocol) is the signaling protocol that sets up and routes VoIP calls.- SIP INVITE: The default. Establishes or updates the active call path, then bridges the transfer. You choose which caller ID the destination sees.
- SIP REFER: Asks the endpoint to start a separate call to the destination for the handoff. Use this only if your telephony provider supports SIP REFER; caller ID behavior then depends on the provider.
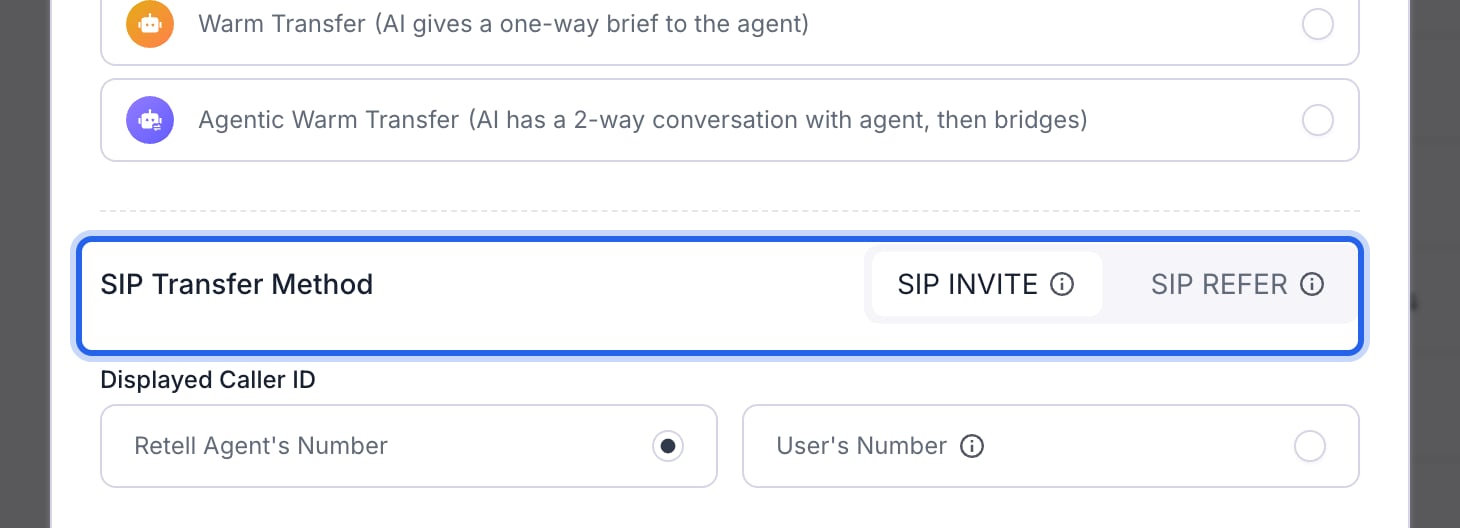
Choose SIP INVITE or SIP REFER for the cold transfer handoff.
Warm transfer settings
During Transfer Call- On-hold Music: What the caller hears while on hold. Defaults to a standard ringtone. You can select custom audio using the ‘Upload Audio’ option. Custom on-hold music supports MP3, WAV, OGG, AAC, M4A, WebM, and FLAC files. Files must be under 10MB and audio must be less than 210s long.
- Transfer Ring Duration: How long the destination rings before the attempt counts as unanswered.
- Navigate IVR: Turn this on if the destination is an IVR system the agent has to navigate.
- Internal queue or hold system: Set this to Yes if the destination queues calls. The agent then waits until a real person starts speaking before it debriefs, within the Wait Time for Agent Answer you set. Defaults to 30 seconds.
- Whisper Debrief Message (optional): A message spoken privately to the destination. The caller cannot hear it.
- Three-Way Ring Tone (optional): A short sound played when the call connects.
- Three-Way Debrief Message (optional): A message spoken to both the destination and the caller once connected.
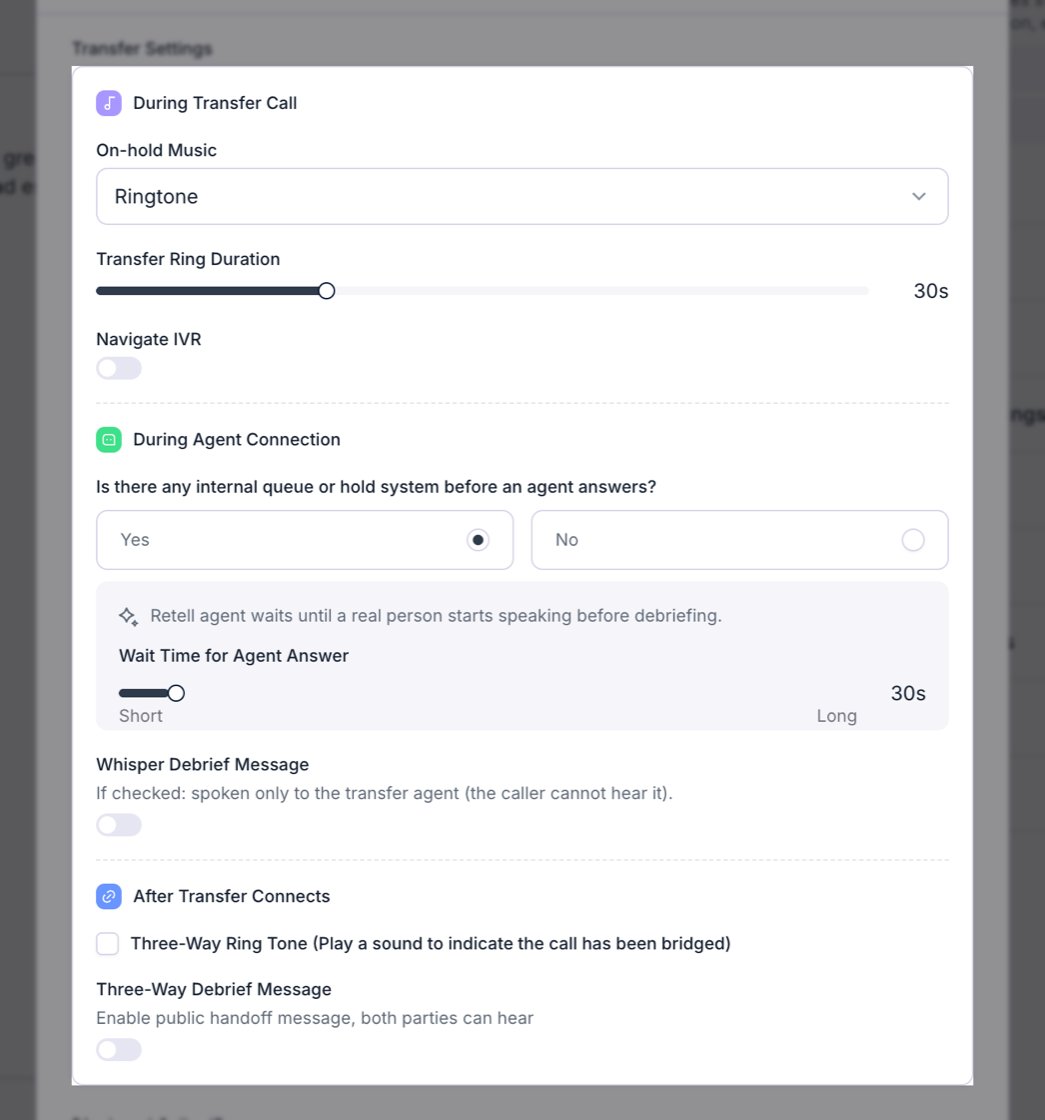
Warm transfer settings, including the queue question and whisper message.
Agentic warm transfer settings
During Transfer Call- On-hold Music: What the caller hears while the transfer agent is working. Defaults to a standard ringtone. You can select custom audio using the ‘Upload Audio’ option. Custom on-hold music supports MP3, WAV, OGG, AAC, M4A, WebM, and FLAC files. Files must be under 10MB and audio must be less than 210s long.
- Transfer Ring Duration: How long the destination rings before the attempt counts as unanswered.
- Two-way Conversation Agent: The transfer agent that talks to the destination and decides whether to connect the caller. See Transfer agents below.
- Wait time for agent answer: How long to give the transfer agent to reach a decision (connect or cancel).
- Action on Timeout: What happens when that wait time runs out: Cancel Transfer (treat it as failed) or Bridge the transfer (connect the caller anyway).
- Three-Way Ring Tone (optional): A short sound played when the call connects.
- Three-Way Message (optional): A short handoff message shared with both sides once connected. Write it as a Prompt (instructions the agent turns into a sentence) or a Static Sentence (the exact words to say).
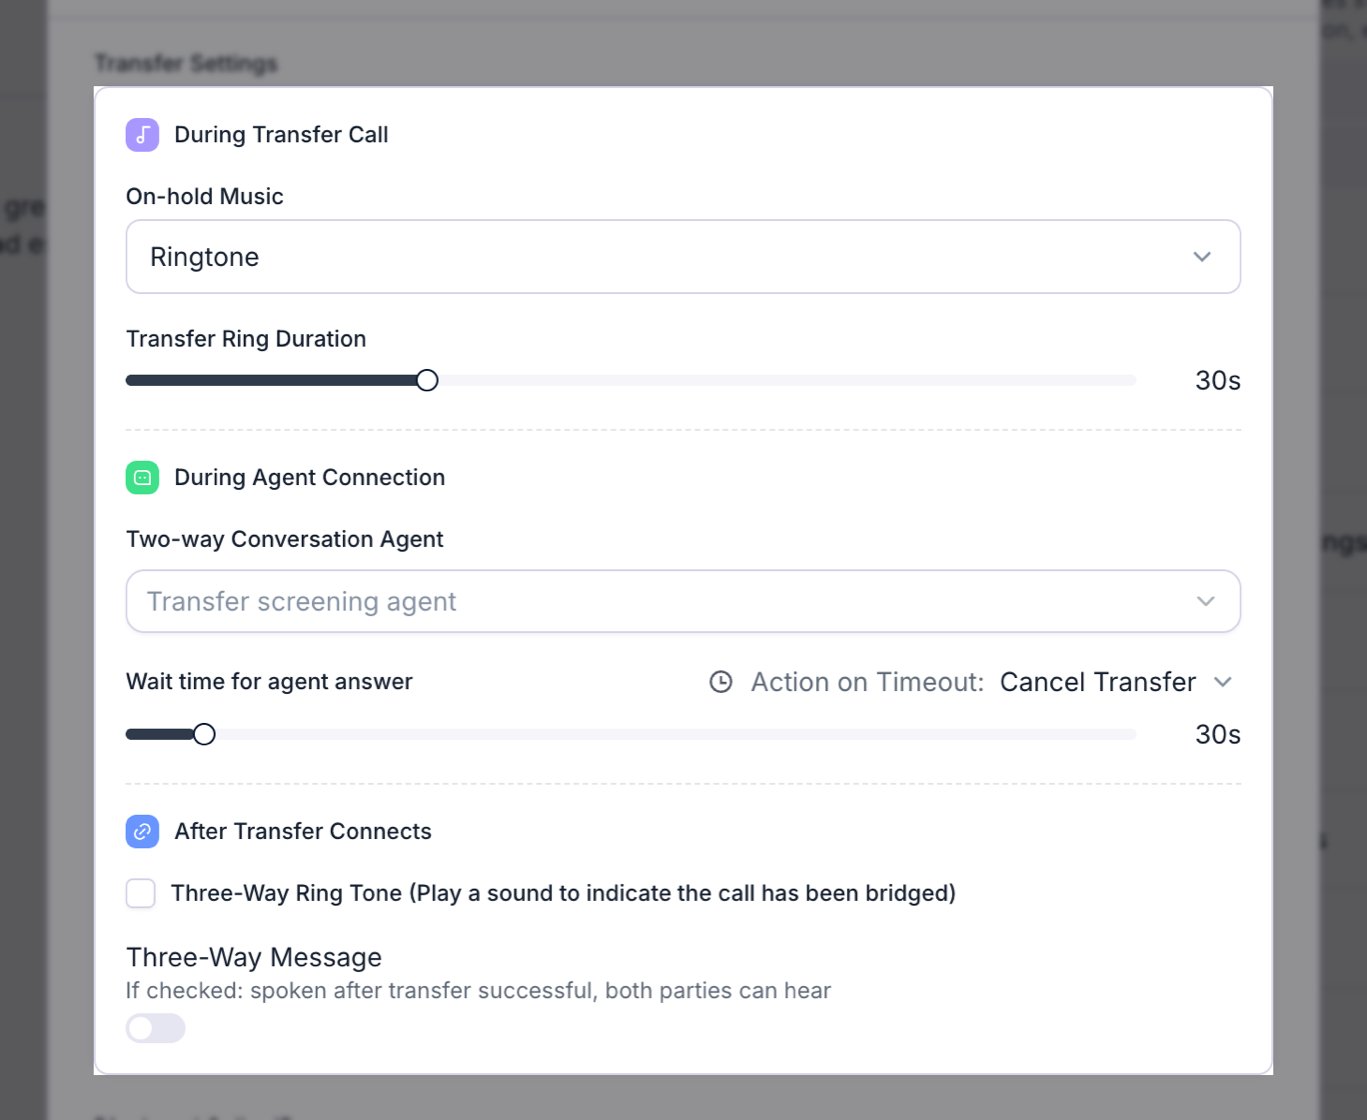
Agentic warm transfer settings, including the two-way conversation agent and timeout behavior.
Transfer agents
A transfer agent is a dedicated agent that screens the handoff. While your caller waits on hold, it calls the destination, talks to whoever picks up, and decides whether the transfer should happen at all. To make that decision it gets two tools no other agent has:- Bridge Transfer: the recipient is ready, so connect the caller.
- Cancel Transfer: the recipient isn’t available, so send the caller back to your main agent, which picks the conversation back up.
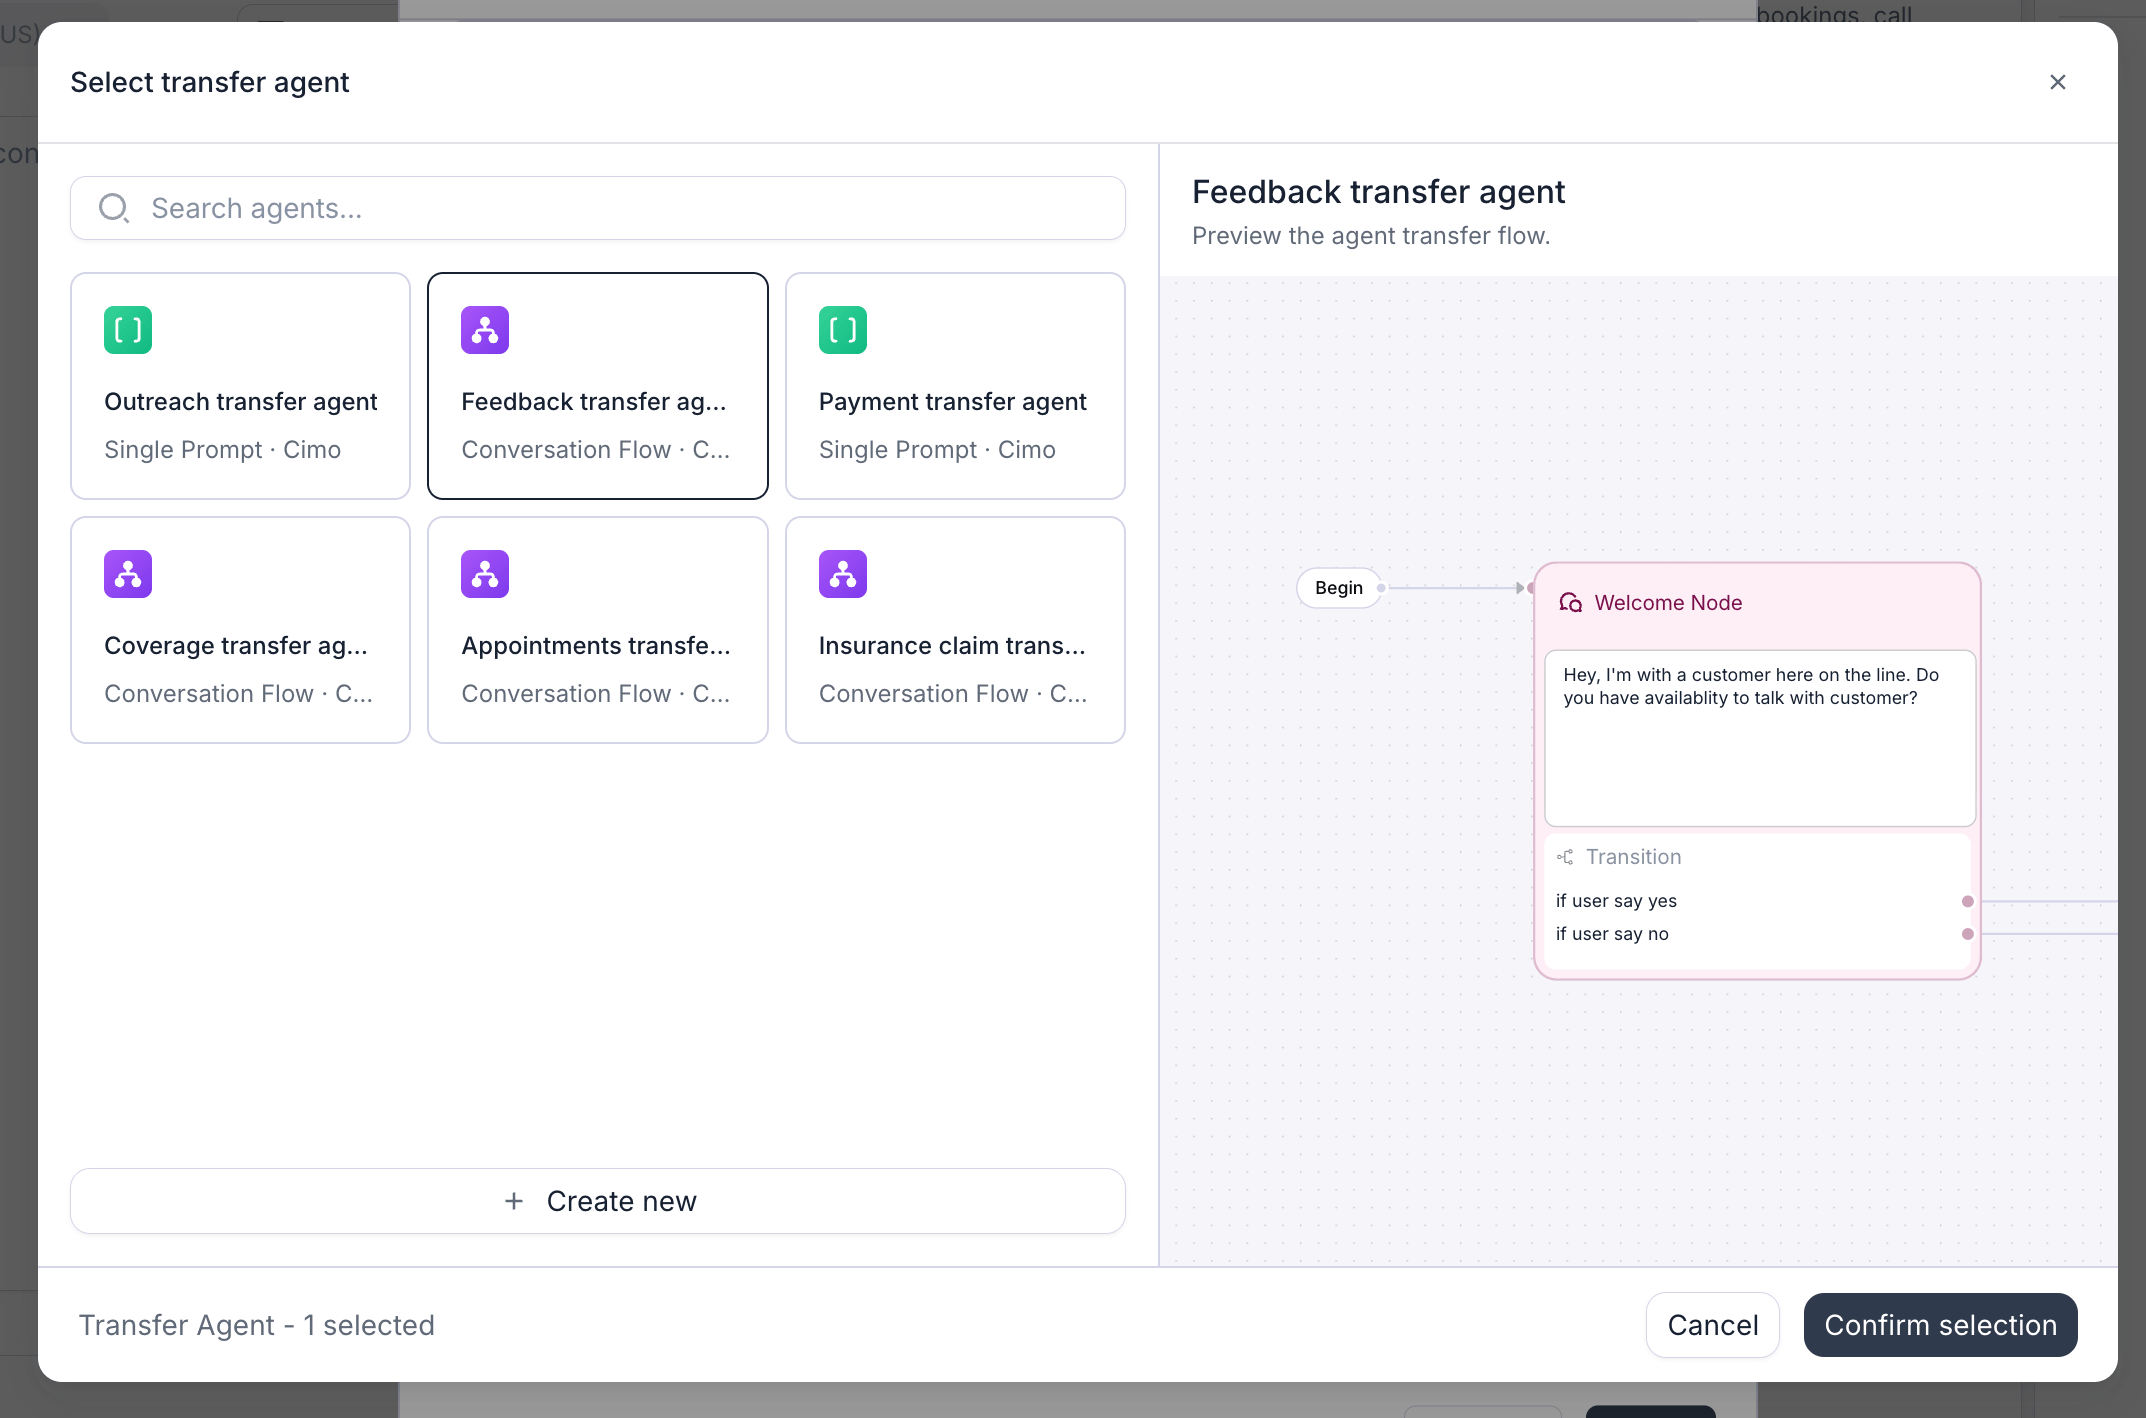
Search for a transfer agent, preview it, then confirm.
Create a transfer agent through the API
When you use Create Agent, setis_transfer_agent to true. This optional boolean defaults to false, and you can only set it when you create the agent.
The response engine must also be configured for transfer use. Set is_transfer_llm to true when you create a Retell LLM, or set is_transfer_cf to true when you create a conversation flow. Custom LLM agents can’t be transfer agents.
The transfer agent is given the original conversation automatically, so you don’t pass it anything. It knows who called and what they wanted, so it can explain the situation to whoever picks up. Dynamic variables carry over too, including anything you extracted earlier in the call, plus original_call_id if you need to tie the two calls together.
What it doesn’t get is anything said after the transfer starts, and your main agent never sees the screening conversation. The two calls are recorded and transcribed separately.
FAQ
What's the difference between Transfer Call and Agent Transfer?
What's the difference between Transfer Call and Agent Transfer?
Agentic warm transfer involves a second AI agent. Isn't that the same as Agent Transfer?
Agentic warm transfer involves a second AI agent. Isn't that the same as Agent Transfer?
How is a transferred call billed?
How is a transferred call billed?
When should I use warm transfer instead of cold transfer?
When should I use warm transfer instead of cold transfer?
The transfer destination sees the wrong caller ID. What's wrong?
The transfer destination sees the wrong caller ID. What's wrong?