

Retell uses the OAuth 2.0 Client Credentials flow for server-to-server authentication. This means no interactive login is required — Retell authenticates directly using the credentials you provide.
Prerequisites
- A Salesforce edition with API access (Enterprise, Unlimited, Developer, or Performance)
- System Administrator permissions in Salesforce
- A dedicated integration user account (recommended)
Step 1: Create a Connected App
1
Open App Manager
Log in to Salesforce as an administrator. Click the gear icon in the top-right corner, then select Setup.In the Quick Find box, type External Client App and click on it.
2
Create a new External Client App
Click New Connected App in the top-right corner.Fill in the Basic Information section: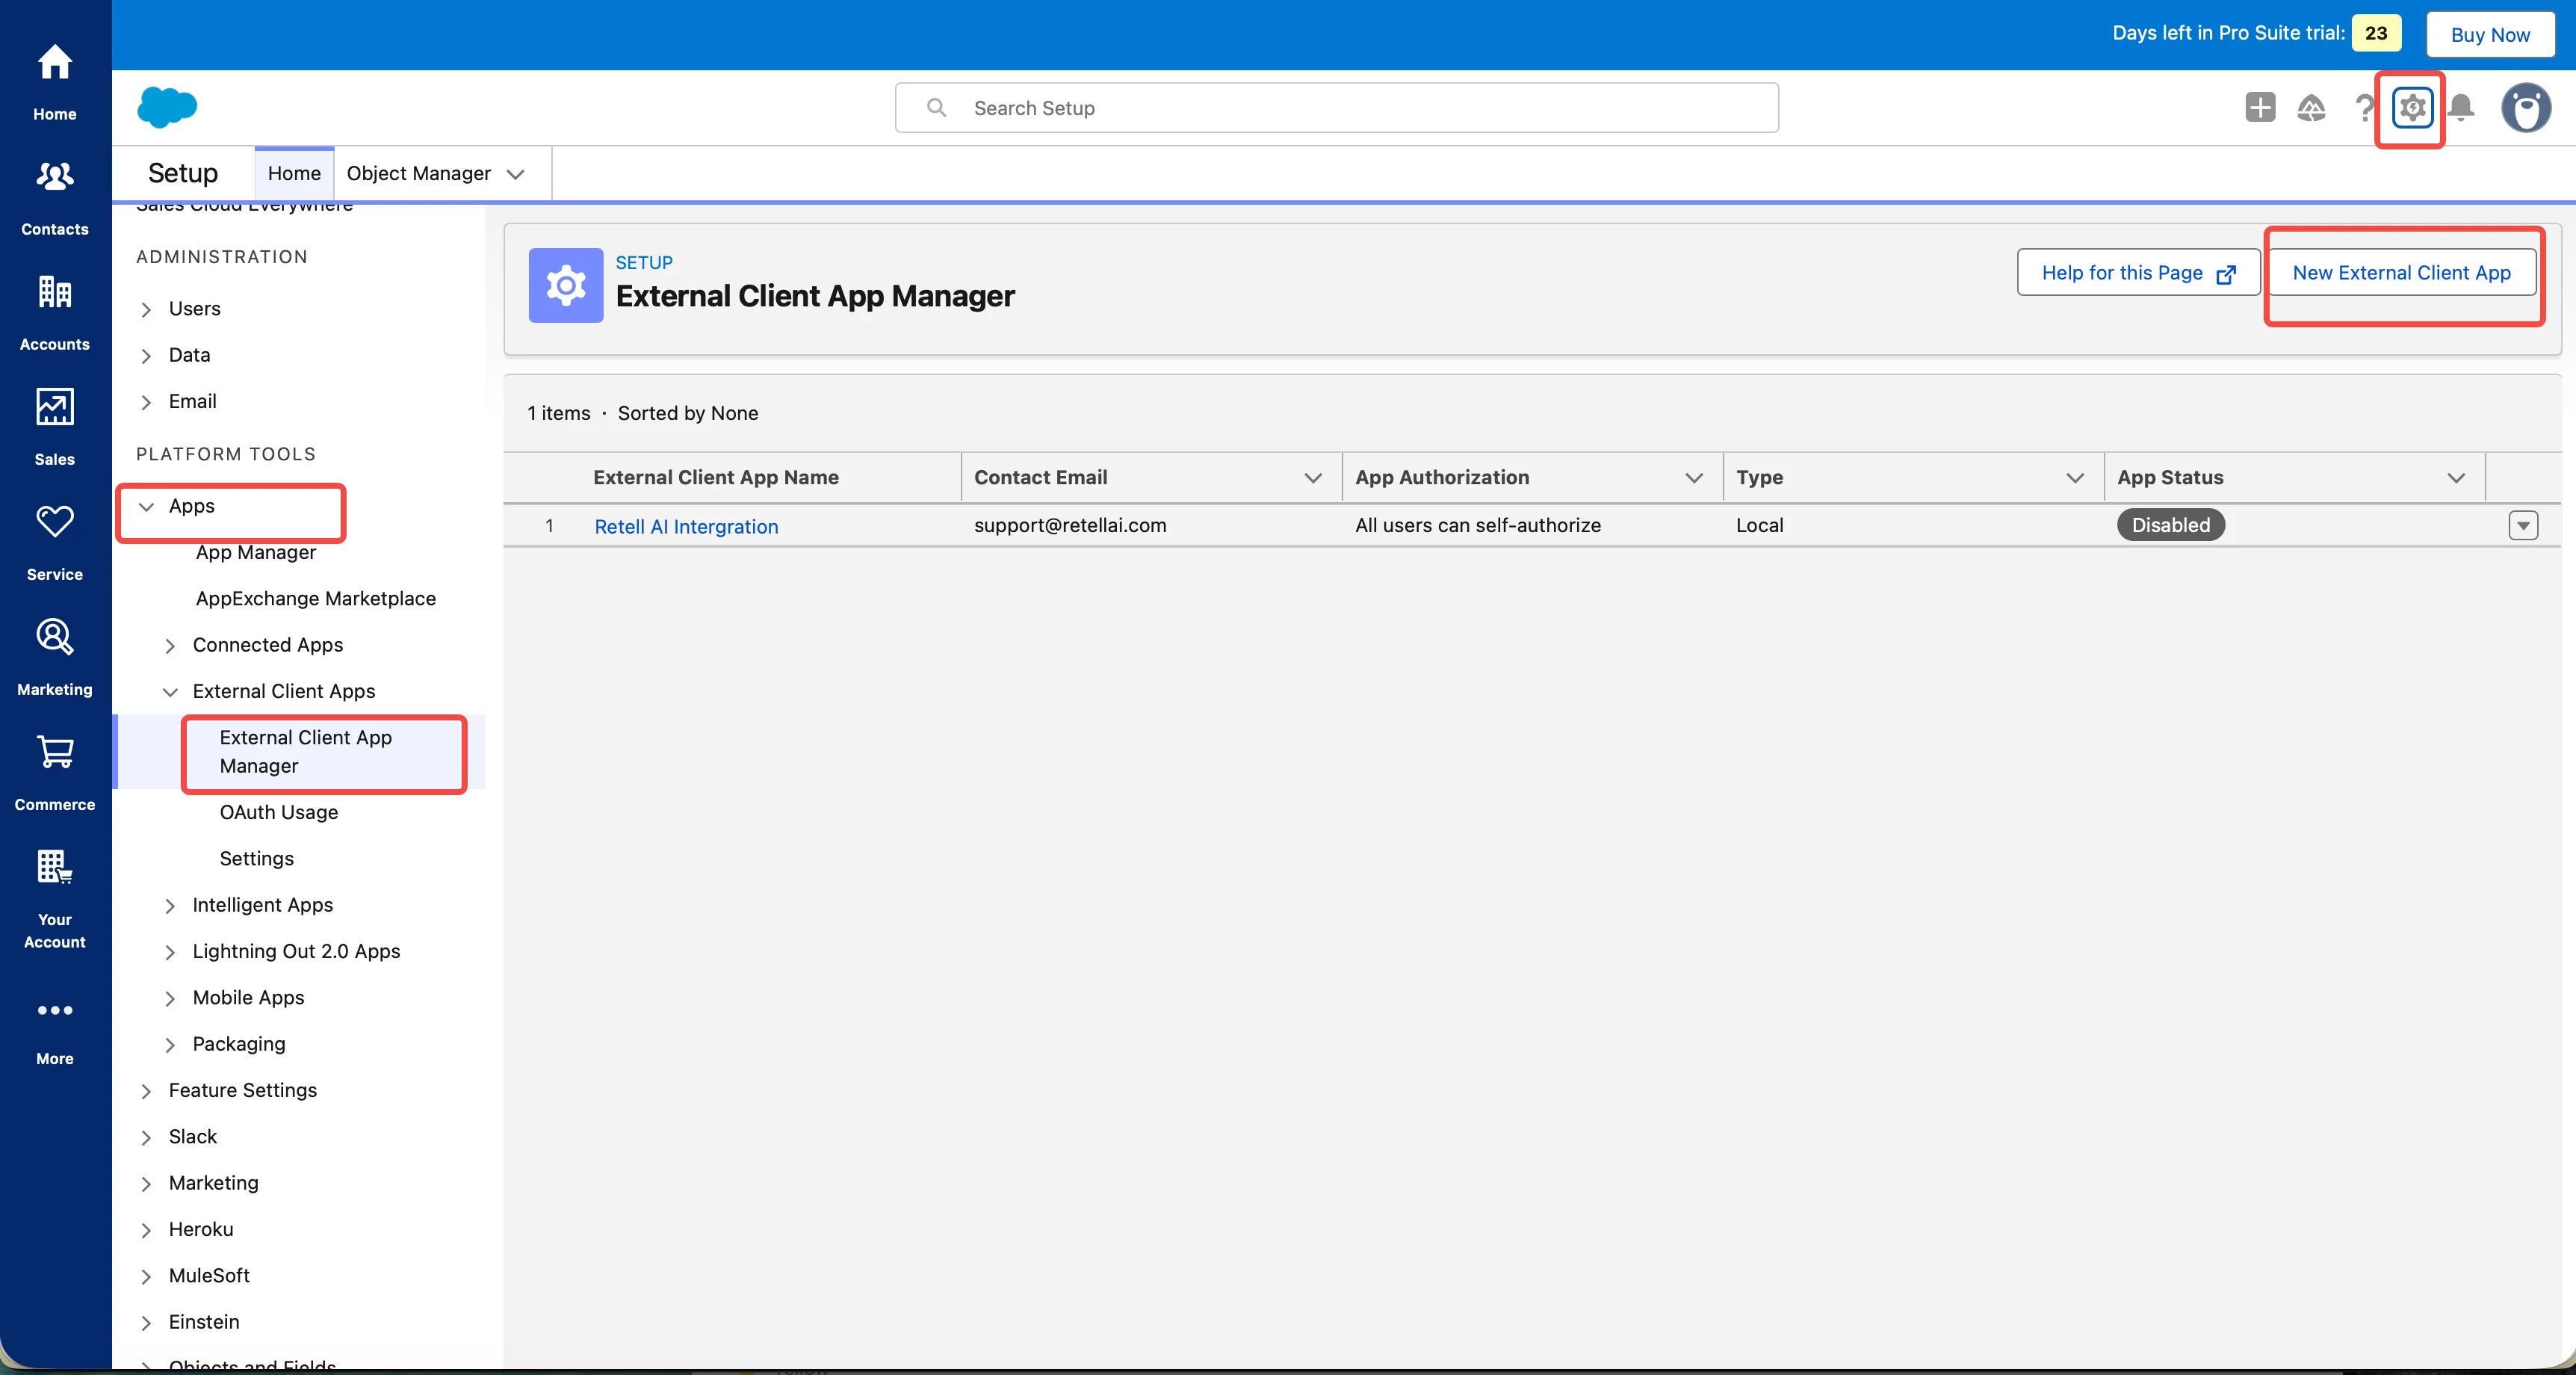
- App Name: Enter a descriptive name (e.g.,
Retell AI Integration) - API Name: Auto-populated from the name
- Contact Email: Your admin email address
Step 2: Enable OAuth Settings
1
Enable OAuth
Scroll down to the API (Enable OAuth Settings) section and check Enable OAuth Settings.
2
Set callback URL
Enter a placeholder Callback URL such as:The Client Credentials flow does not use a callback URL, but the field is required.
3
Enable Client Credentials Flow
Check Enable Client Credentials Flow. This is the critical setting that allows Retell to authenticate without interactive login.
4
Select OAuth scopes
Under Selected OAuth Scopes, add the following scopes from the Available list: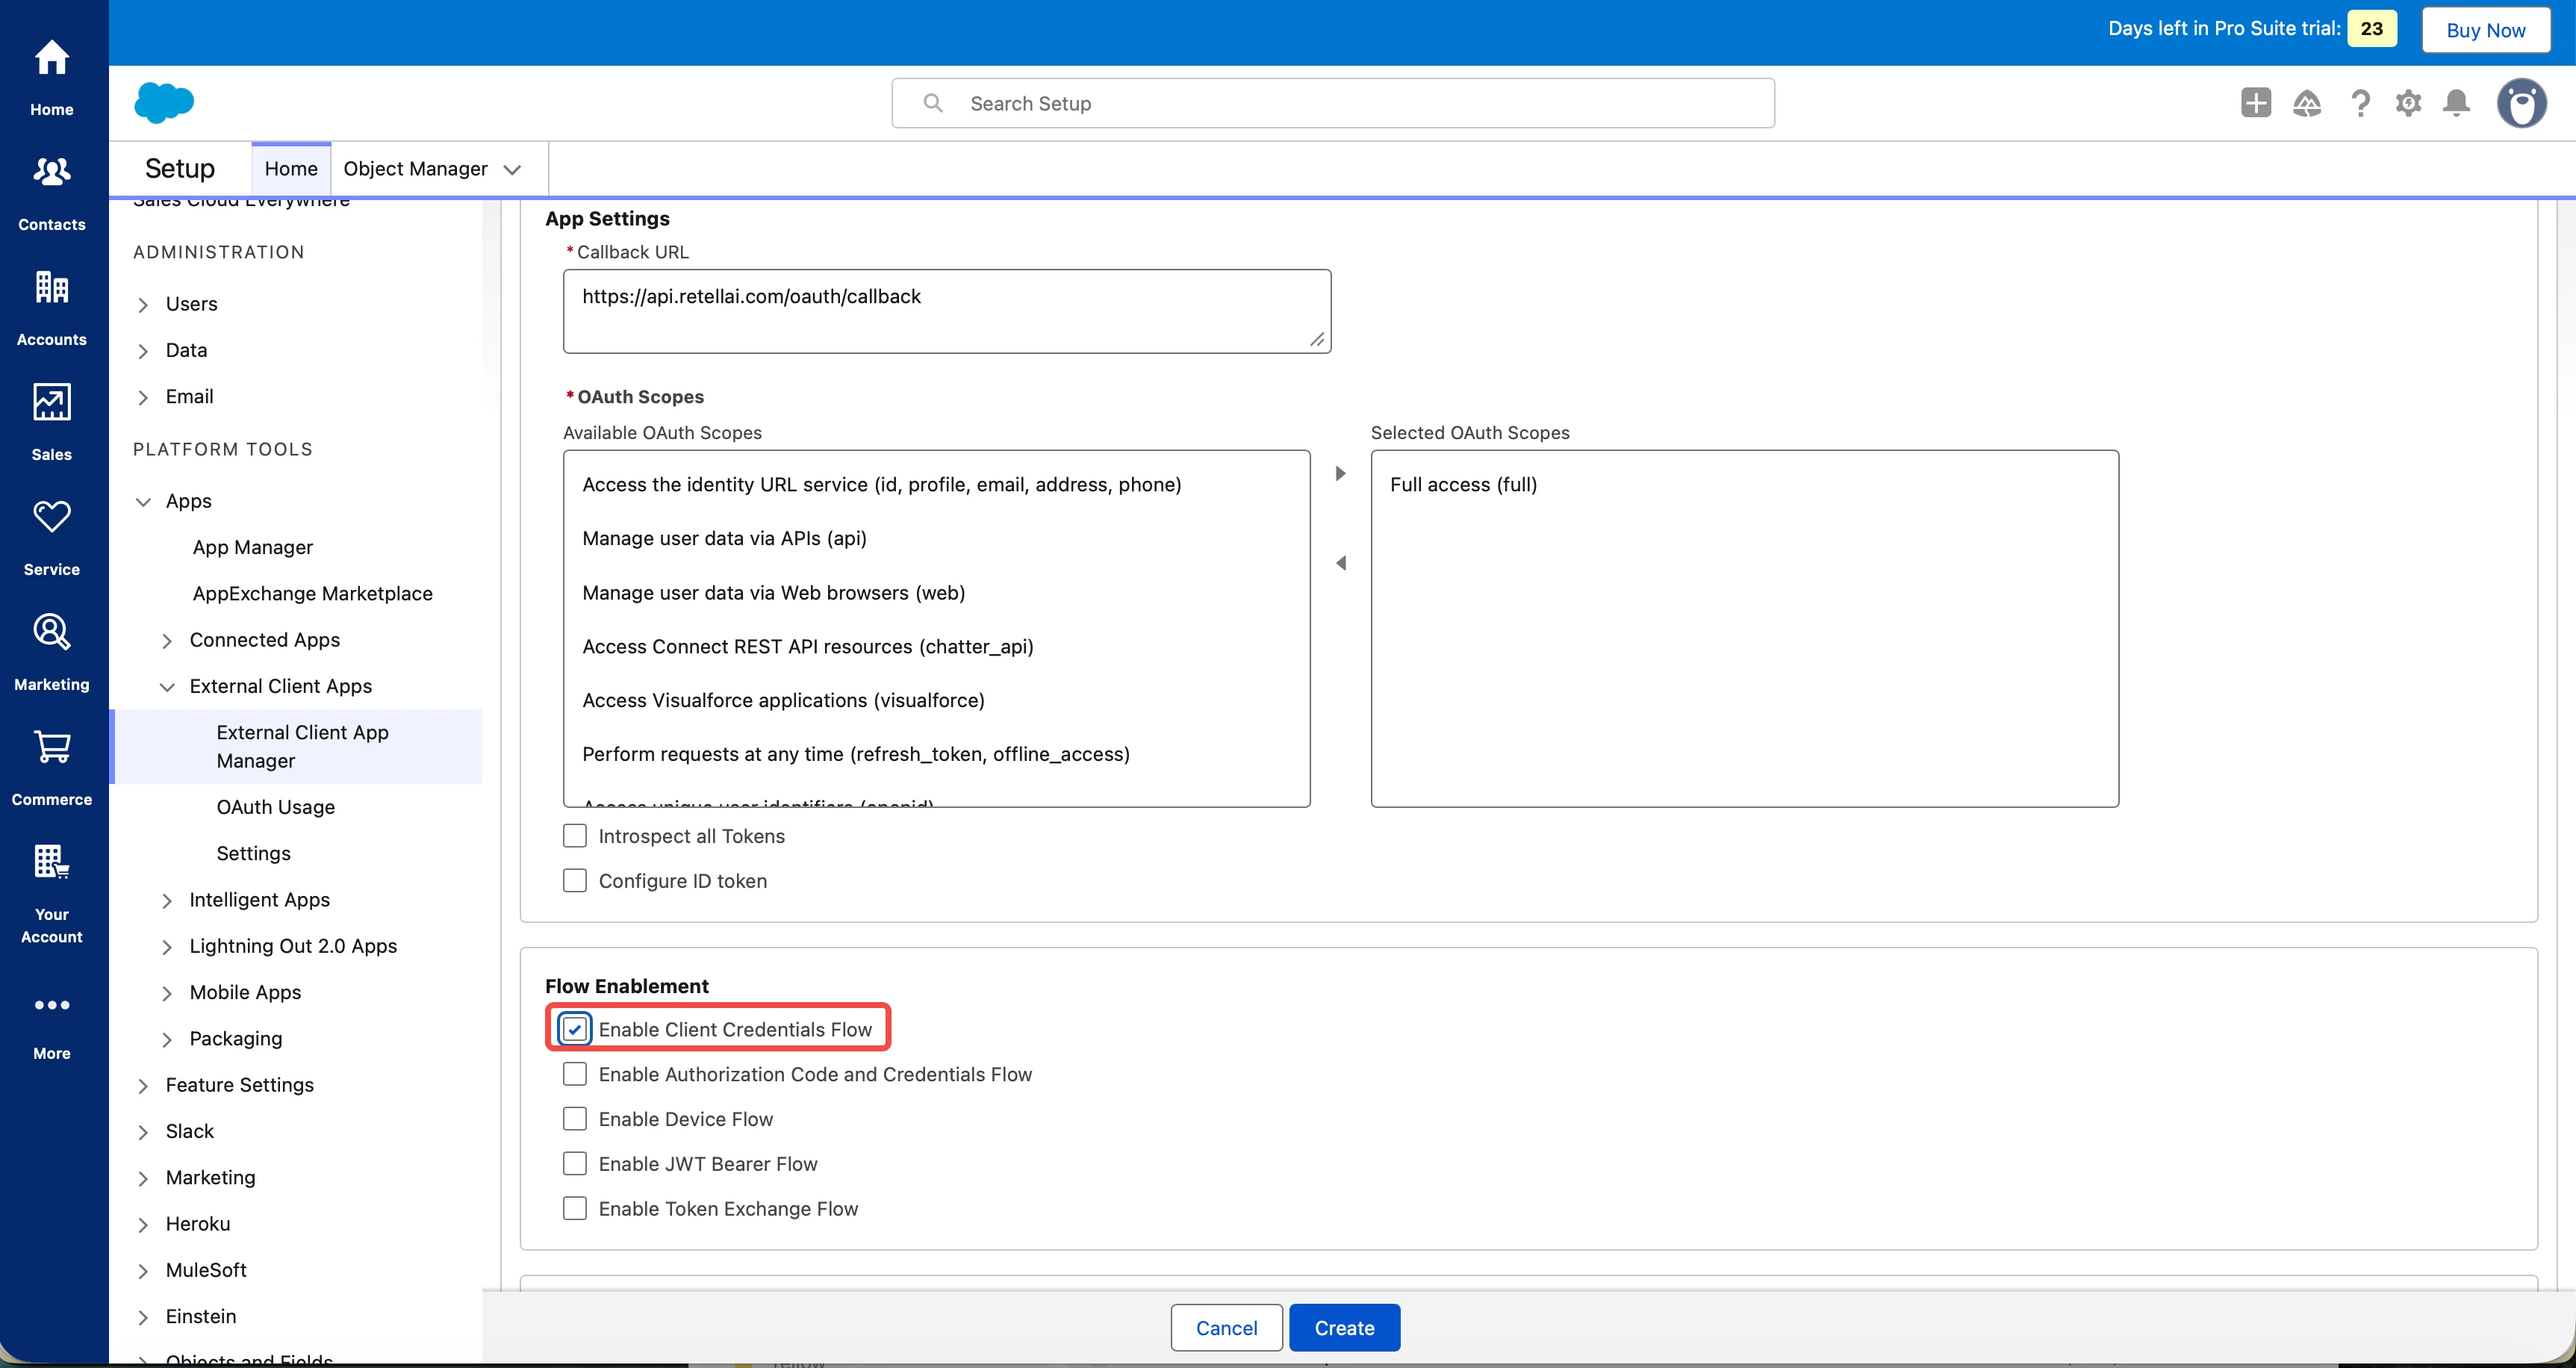
- Manage user data via APIs (api) — required for REST API calls
- Perform requests at any time (refresh_token, offline_access)
5
Save the Connected App
Click Save.
Step 3: Get Consumer Key and Consumer Secret
1
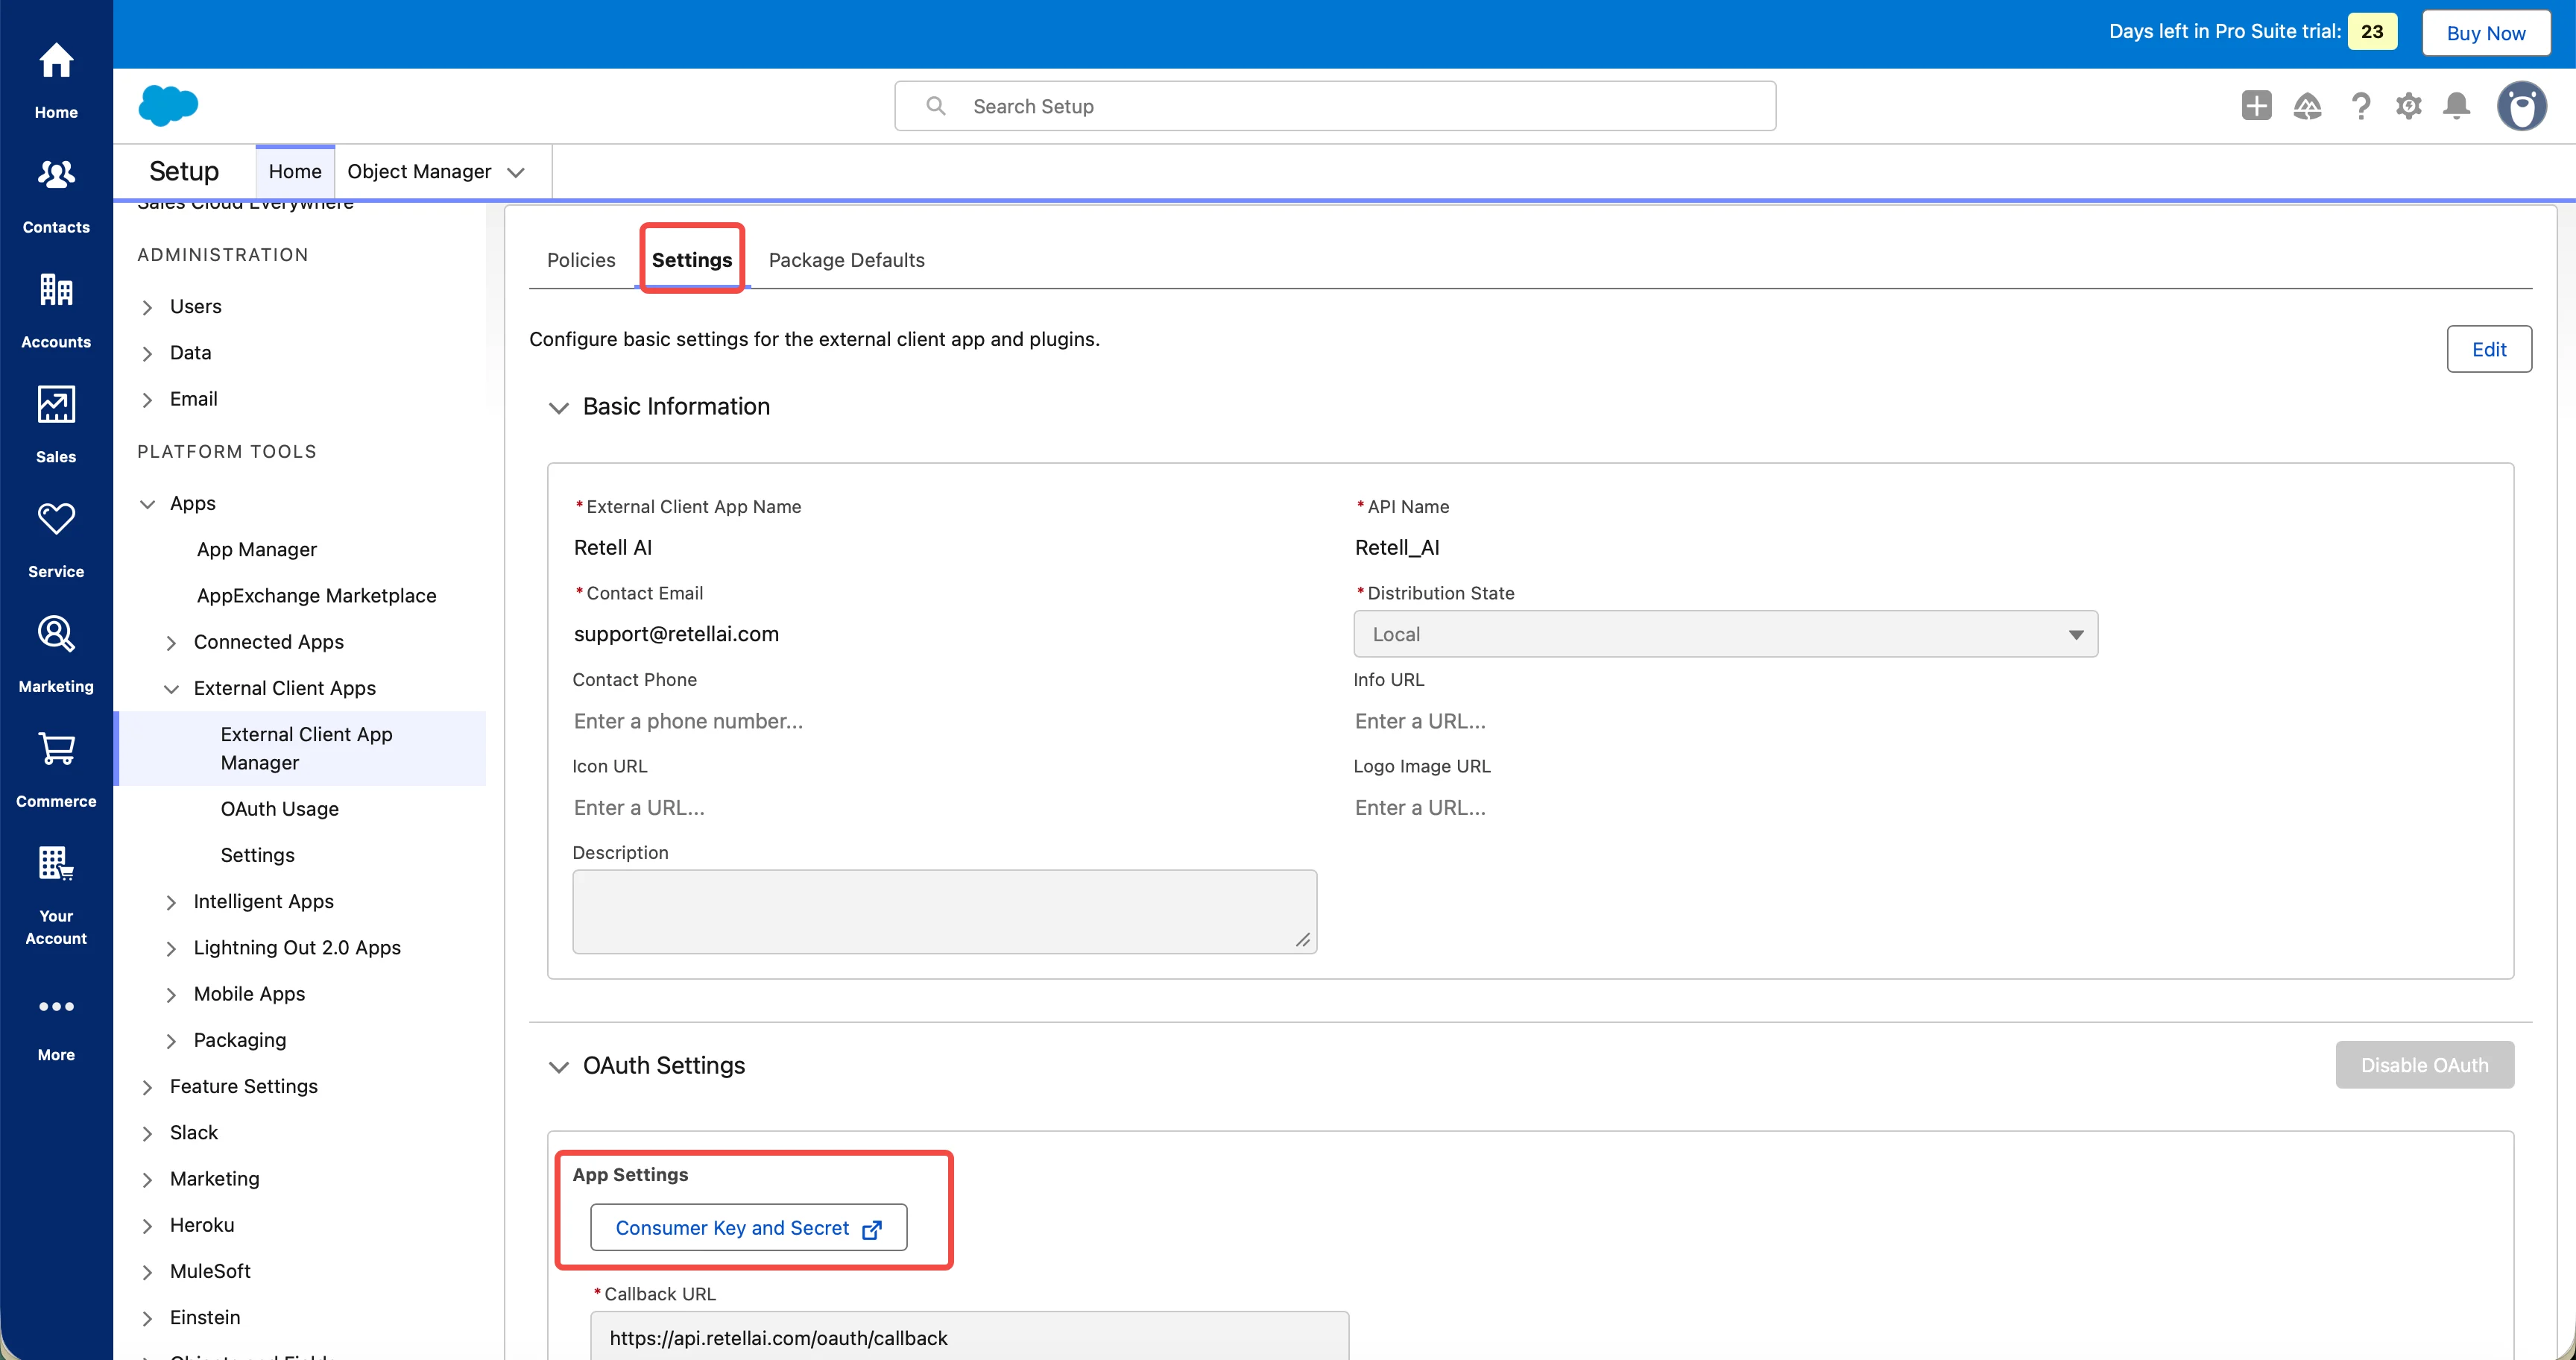
View consumer details
After saving, you’ll be taken to the Connected App detail page. Click Consumer Key and Secret.You may be prompted to verify your identity via an email verification code.
2
Copy your credentials
Copy and securely store both values:
- Consumer Key — this is your Client ID
-
Consumer Secret — this is your Client Secret
Step 4: Configure App Policies
1
Open the Policies tab and edit
OAuth Policies:
- Enable Client Credentials Flow.
2
Set the Run-As user
Under the Client Credentials Flow section, select a Run As user. This is the Salesforce user whose permissions the integration will use for all API calls.
3
Save the policies
Click Save.
Step 5: Connect Salesforce in Retell
1
Navigate to Integrations
In the Retell Dashboard, go to the Integrations section and select Salesforce.
2
Enter your credentials
Enter the Client ID (Consumer Key) and Client Secret (Consumer Secret) from Step 3.Provide your Salesforce domain URL (e.g., 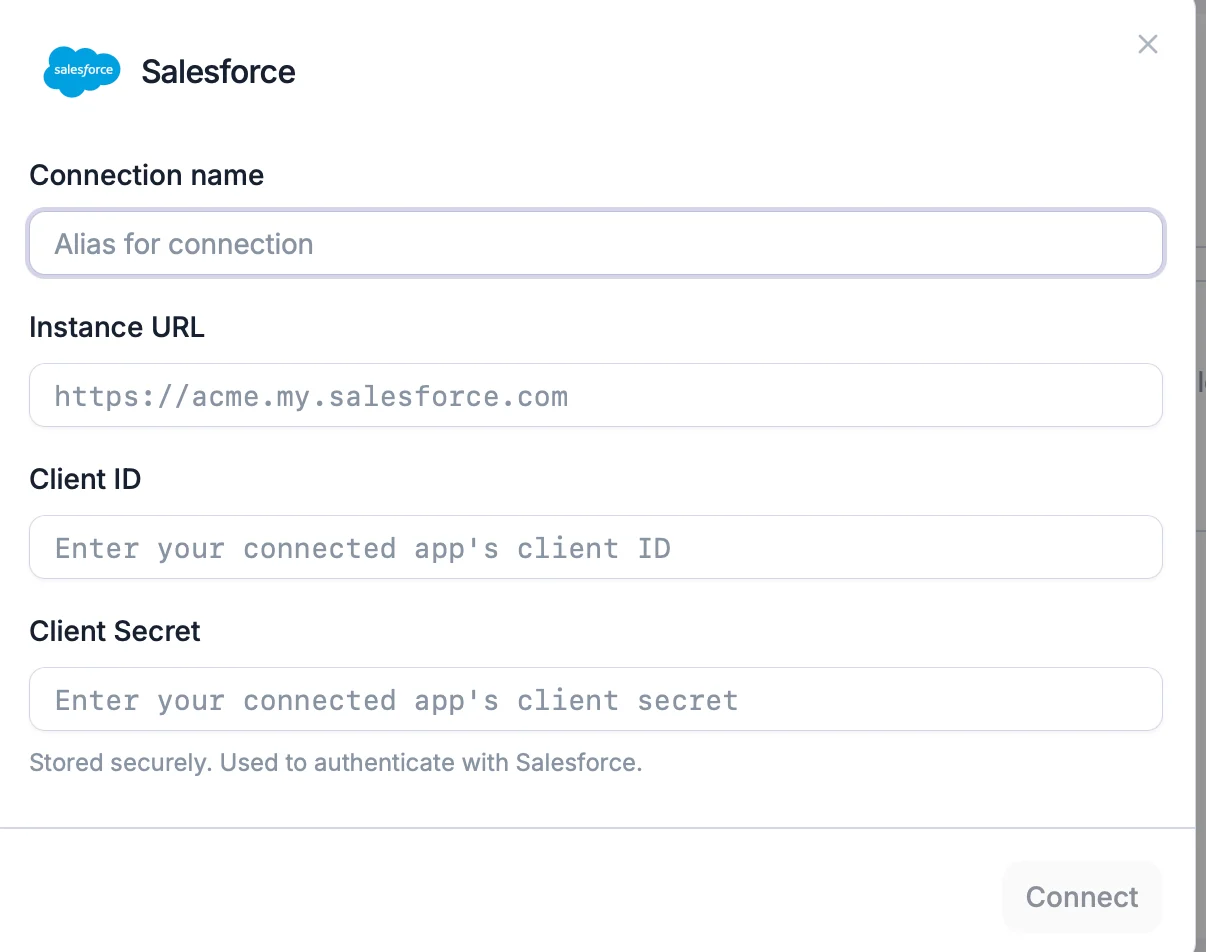
https://your-org.my.salesforce.com).